What to do when your van decides to give up miles away from any garage? Breakdowns in vanlife are the nightmare lurking behind every turn, threatening your road trip. But with tools like a multifunction toolkit or a puncture repair spray, combined with a method to diagnose mechanical failures, you can turn it into just a minor adventure shared around a campfire. Discover the reflexes to adopt, tips to save on your repair budget, and the emergency solutions tested by experienced vanlifers, even in nature or abroad.
Quiz: Are you really ready to face a breakdown?
Check the items you own or master to discover your level of preparation
Part of this article • To be completed in a few seconds
Better to prevent than to cure: prepare to face breakdowns calmly
Know your vehicle inside out
Spending days stuck on the side of the road due to a minor issue can quickly become a nightmare in a converted vehicle. So yes, I know, not everyone is a top-notch mechanic (I know what I’m talking about), but knowing your van inside out can save you from many troubles. Read your manual like a survival guide or, in the age of social media, don’t hesitate to watch tutorials on YouTube: you’ll learn how to spot fuses, check levels (oil, coolant), or decode your electrical panel. If you plan to live nomadically year-round, do some breakdown tests before you leave. Anyway, even with a lucky star, it’s not impossible that you’ll have something to fix one day.
The essential minimum of the toolbox
Personally, I recommend taking a must-have before you leave. Of course, it will depend on the type of camper van, the type of vehicle you have. The more space you have, the more tools you will take. But for us, here’s the essentials to slip into your bag:
| Category | Main elements | Usefulness | Practical advice |
|---|---|---|---|
| Basic tools | Wrenches, socket wrenches, screwdrivers, pliers, cutter, hammer | Carry out simple repairs and furniture adjustments | Choose quality tools to avoid bending |
| Electricity / 12V | Multimeter, fuses, insulating tape, cables, terminals, headlamp | Diagnose electrical failures and repair small circuits | Store your fuses by gauge in a labeled box |
| Mechanical emergencies | Jack, wheel wrench, jumper cables, 12V compressor | Change a tire, restart the engine, or inflate a tire | Always test the equipment before leaving on a trip |
| Engine maintenance | Oil, coolant, gloves, rags | Check and top up levels regularly | Keep a small mechanical kit accessible from the outside |
| Minor repairs | Epoxy glue, wire, duct tape, cable ties, screws | Deal with a broken item or a loose assembly | (Tip: duct tape often saves an entire day) |
| Living area | Faucets, batteries, spare bulbs | to maintain hygiene! | Since buying the camper van, we have already had to change the kitchen faucet twice; they are electric and mechanical plastic faucets, and it’s a real mess |
| Safety & comfort | Gloves, work lamp, first aid kit | Work safely and manage minor injuries | Always keep this part within immediate reach |
A lightweight but complete kit allows you to repair 80% of common breakdowns.
Video on maintaining a converted vehicle
Breakdown on the road: the quick diagnostic guide to know what to do
Step 1: safety first
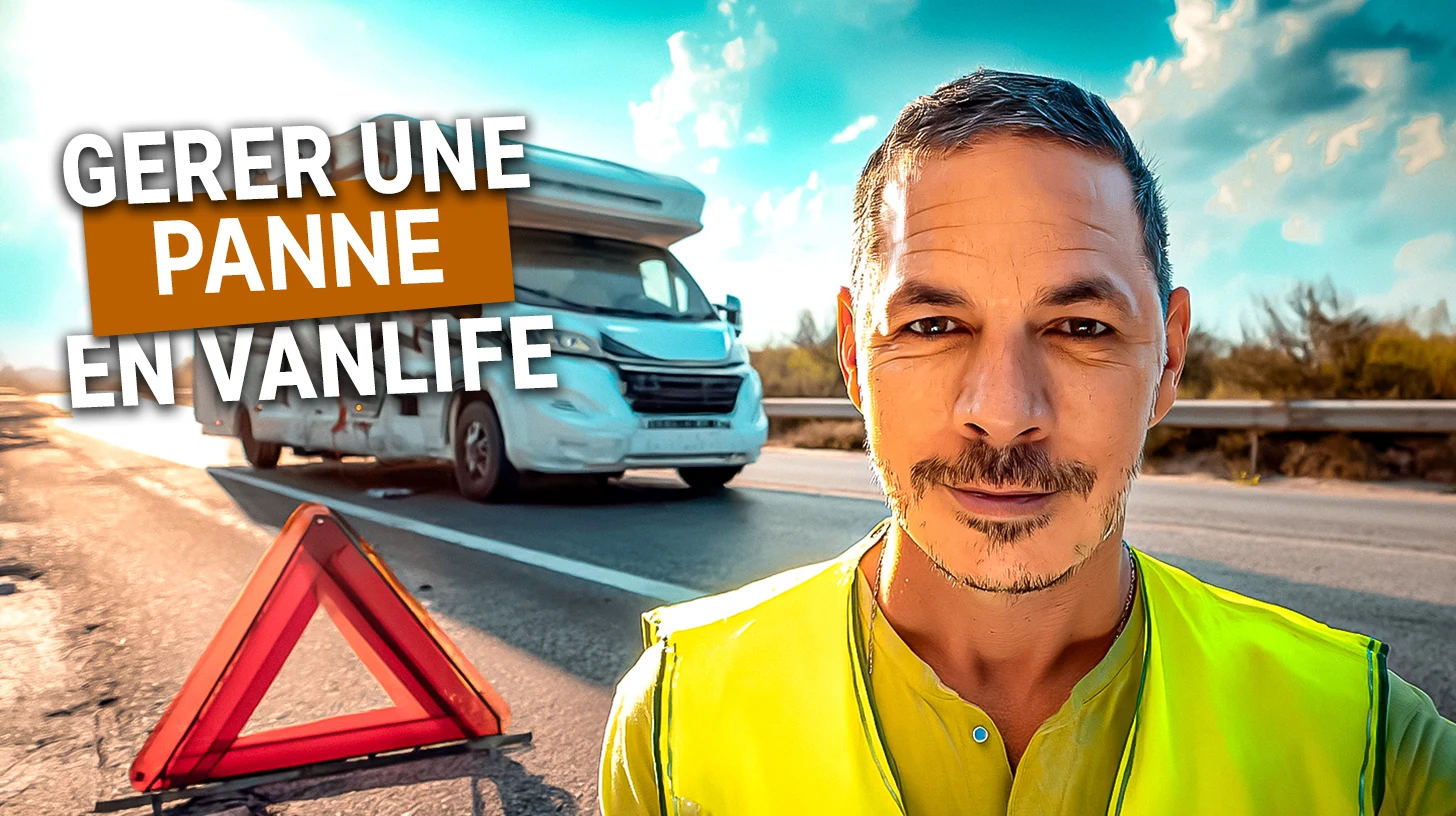
Before even trying to understand the breakdown, protect yourself. Immediately activate the hazard lights. Park as far away from traffic as possible. Put on your safety vest before exiting on the passenger side. Place the warning triangle at a good distance to alert other users. On a national road, position it at least 30 meters behind your vehicle.
On the highway, move behind the guardrails. It is said that the life expectancy of a human on the highway who is not behind these guardrails is 20 minutes, so avoid being reckless. If you can and if they exist in the country you are in, prefer the orange emergency call boxes to signal your position. In short, the main reflex to remember is Never stay close to a stranded van on a fast lane.
⚠️ The 5 safety reflexes in case of breakdown
Step 2: quick diagnosis
Take a deep breath; you need to avoid panicking, as it will cloud your judgment. Observe the dashboard lights. An illuminated engine light may indicate a dead battery. A strange noise or smell? Check the electricity in the living area. If the lights work but the engine doesn’t, the problem may lie with the chassis battery. To help you, here’s a diagnostic checklist.
| Symptom | Possible cause | What you can check yourself | When to call a pro? |
|---|---|---|---|
| The engine won’t start | Chassis battery dead | Test the headlights. Try starting with cables | If that doesn’t work |
| The engine “coughs” but won’t start | Fuel or ignition problem | Check the tank and the type of fuel | Contact a pro immediately |
| Flat tire | Puncture | Use a puncture repair spray or change the tire if you know how to do it | If you don’t have a spare tire |
| No water at the tap | Water pump primed, fuse, empty tank, water heater in safety mode | Check the water level, the fuse, and try to re-prime | If the problem persists |
| No 12V electricity | Auxiliary battery, fuse, circuit breaker | Check the voltage, the fuse, and the circuit breaker | If you can’t find the cause |
Mechanical failure or cell problem: identify the source of the issue
Hover over or click on each point to discover the details
A discharged battery can be recharged via a charger. Avoid leaving power-hungry devices plugged into the cigarette lighter. A dead battery needs replacement.
Various causes: incorrect pressure, overload, or wear. Regular checks prevent unexpected stops. Ensure your spare tire is usable.
A significant temperature change can deform the tire, creating a flat spot. Result: significant vibrations that increase with speed.
May indicate a cold engine (normal) or a coolant issue. If the smoke persists after starting, consult a mechanic.
Often results from excess fuel, linked to a clogged air filter. Cleaning or replacing the filter usually resolves the issue.
Suggests wear of piston rings. Engine oil burns in the cylinders. This signal warrants urgent mechanical expertise.
Powers living equipment. Can discharge due to bad weather, overconsumption, or blown fuse. An automatic protection box (like Victron) prevents battery damage.
Vibrations can electrically disconnect the pump. The pump can also lose prime and require manual reprime.
When the water is too cold, the cumulus goes into safety mode and opens the hatch under the camper. Water drains from underneath instead of coming out of the tap.
Often under windows, require urgent repair. Waterproof tape temporarily seals the crack. Annual joint inspection prevents these infiltrations.
Click on the points for more details • 6 mechanical failures + 4 cell failures
Common mechanical failures
The engine battery is often the first to be affected. A discharged battery can be recharged via a charger or a trailer, especially if your battery serves both as cells and as the engine battery, which is still somewhat rare, let’s admit it. Normally, it’s not uncommon for some people to leave a very energy-hungry device plugged into the cigarette lighter, which can harm your engine battery. A dead battery requires replacement. To avoid unpleasant surprises, test it before each (long) departure.
Flat tires can hide various causes: incorrect pressure, overload, or wear. Regular checks prevent unexpected stops. If the spare tire is unusable, it’s better to anticipate.
A flat tire can also pose a problem. So it’s not a flat tire, it’s a tire that has suffered distortion due to a significant temperature change. We once drove back from France to Portugal with the camper shaking quite impressively, where I even thought it was a suspension problem. That was not the case at all; it was just one of the tires that was no longer perfectly round, and part of the tire was flat. This meant that every time the wheel turned, it caused a vibration at the moment the road and the flat side met. And I can say that the faster you drive, the more you felt a horrible vibration in the camper.
Engine problems are indicated by colored smoke. White smoke can indicate a cold engine or a coolant problem. Black smoke often comes from excess fuel, related to a clogged air filter. Blue smoke suggests wear on the piston rings. These signals deserve expert attention if the problem persists.
Common cell failures
The auxiliary battery powers the onboard living equipment. A discharge can result from bad weather, overconsumption, or a blown fuse. A multimeter helps to diagnose quickly. If you have an electrical system with a panel, the best option is still the small box that allows you to automatically turn off your battery if it drops below a certain threshold. This helps avoid damaging your cell battery. I know that at Victron, I have this small box that I can even activate or deactivate remotely via Bluetooth, which I did every night before going to sleep, and it also helped remove all the little blue lights that brightly illuminated the inside of the camper.
Anything related to water can also frequently fail in a camper. Since it operates with a pump, it can, due to vibrations, disconnect electrically. I once had to prime the pump because it had lost its prime, and it also happened that when the water was too cold, the water heater would go into safety mode and open the hatch under the camper. Thus, when I turned on the water, instead of coming out of my faucet, it came out from underneath the camper.
Water leaks, often under windows, require a emergency repair. Waterproof tape temporarily seals the crack. An annual inspection of seals prevents these infiltrations.
Time to call for reinforcements: insurance and assistance, user manual
A van breakdown requires quick reflexes. Review your insurance contract before departure to avoid unpleasant surprises: repatriation guarantees, accommodation costs, or mileage deductibles. Personally, when our clutch broke in the middle of nowhere on a Saturday night in Spain, at the end of January, I was quite happy to have chosen good insurance that could come to help us by Monday morning. The choice of vanlife insurance determines these coverages.
Before departure, check the coverage in case of a distant breakdown, accommodation while waiting for repairs, and repatriation. Some contracts include 24/7 assistance for mechanical or electrical failures. For trips abroad, ensure international towing. For example, some packages eliminate the mileage deductible, avoiding payment for a breakdown 10 km from home.
D-Day: contact your assistance
In case of a breakdown, follow these steps:
- Retrieve your contract number and insurance contact. Store them in an accessible place even without battery, like a leather case attached to the van key.
- Provide your exact location: mile marker, GPS, or parking area.
- Describe the breakdown: engine, battery, fuel, or water system (e.g., “Water supply problem”).
- Note the file number and the identity of the contact person for the procedures.
Whether via an app or a call, stay methodical. Check if your insurance offers a replacement vehicle: a luxury when you have a trip to honor.
When your home on wheels is immobilized
The backup plan for the night: where to sleep when your vehicle is in the garage?
In case of a breakdown, the essential thing is to find a roof quickly. Here are the tested options adjusted to your budget.
- Contact relatives or friends. Prefer short stays to avoid overburdening your hosts.
- Use apps like Couchsurfing. Choose profiles with recent reviews to avoid unpleasant surprises.
- Budget 25 to 50 €/night for economical accommodations. Opt for flexible bookings.
- In case of long repairs, prefer Airbnb.
Some insurances cover 1 to 2 nights in a hotel. Check the terms of your contract to anticipate.
The nerve of the war: the financial safety net
A breakdown is expensive. Plan a financial cushion to avoid stress. Concrete examples.
We have written articles on the cost of maintaining a converted vehicle, but be aware that in case of an emergency, it may end up costing you more! (easily count on 30% more!)
What to do with your belongings?
Some garages will allow you to leave a few belongings. But otherwise, here is a quick logistical solution.
- Prepare a light bag (max 11 lbs) with papers, laptop, and clothes for 2-3 days. Include a basic kit (charger, toothbrush).
- Store the rest in a garage (if possible) or a storage unit (10 to 30 €/month for 54 sq ft).
- In case of doubt, retrieve your belongings with local contacts. Offer a service exchange to reduce costs.
Breakdown abroad: a moment of happiness
Communicating with the mechanic: the language barrier
It all depends on the country where you break down and your level of English. If you and the mechanic have some basics, the discussion will go smoothly. But if neither of you really masters the language, things can get a bit complicated (and gestures quickly become your best ally).
Fortunately, today, tools like Google Translate or even ChatGPT can save the day. You speak in your language, the mechanic in theirs, and artificial intelligence takes care of the conversation between the two of you. In instant messaging mode or text scanning, these tools translate your exchanges and allow you to explain a breakdown, a faulty part, or a suspicious noise without stress.
Keep in mind a few universal keywords (it always helps). For example: flat tire for a punctured tire, brake pad for a brake pad, or timing belt for a timing belt. And above all, before any repair, don’t forget to ask for a written estimate (in English quote, in Spanish presupuesto). This will save you from many unpleasant surprises when it comes time to pay the bill.
Insurance and specific procedures
Make sure your international insurance covers via the green card, a document proving your valid insurance in Europe. In case of vehicle repatriation, expect costs that can reach €2000 depending on the distance. Keep all invoices: they will serve as proof for partial reimbursement through your insurance. In Spain, always request the hoja de reclamaciones, an official complaint form in case of a dispute.
What to do if my mechanic can't find the issue with my van?
The total hassle when the specialist shrugs and says "I don't see it"! But don't panic, we've all been there. I recommend you leave with your personal checklist: did you note any strange noises before the breakdown? What were the warning lights showing? And the tire pressure, did you check it? Sometimes, it's a detail that gets stuck. If the mystery persists, contact a tow truck to bring your van home or to another workshop. And honestly, always set aside an emergency fund for these unexpected events - at least €500, it's a lifesaver!
How to move my broken-down motorhome?
When your home on wheels refuses to move, safety comes first! Start by marking with triangles and stay in the vehicle if it's an emergency stop. For moving, two options: call a specialized RV tow truck (expect 150-300€ for 50km) or, if you have a light van, connect it to a Duster with a flat trailer (be mindful of regulations). And a personal tip: always keep a folded tow strap in your trunk. You'll thank me when you meet a friendly traveler who helps you get to a safe spot!
And what if a garage refuses to repair my van?
It happens more often than you think, especially with custom setups. First, stay calm: classic mechanics hate tinkering with vanlife electrical systems. Here’s your plan B: reread your electrical manual (if you did it like the pros), check the fuses and the auxiliary battery cables. If it’s mechanical, look for a "camper van" garage through apps like RoadSurfer Spots. And an experienced vanlifer's secret: traveler networks are your best insurance. A message on the Facebook group "Vanlifers in distress" and boom, you find a traveling mechanic near you in 2 hours max!