


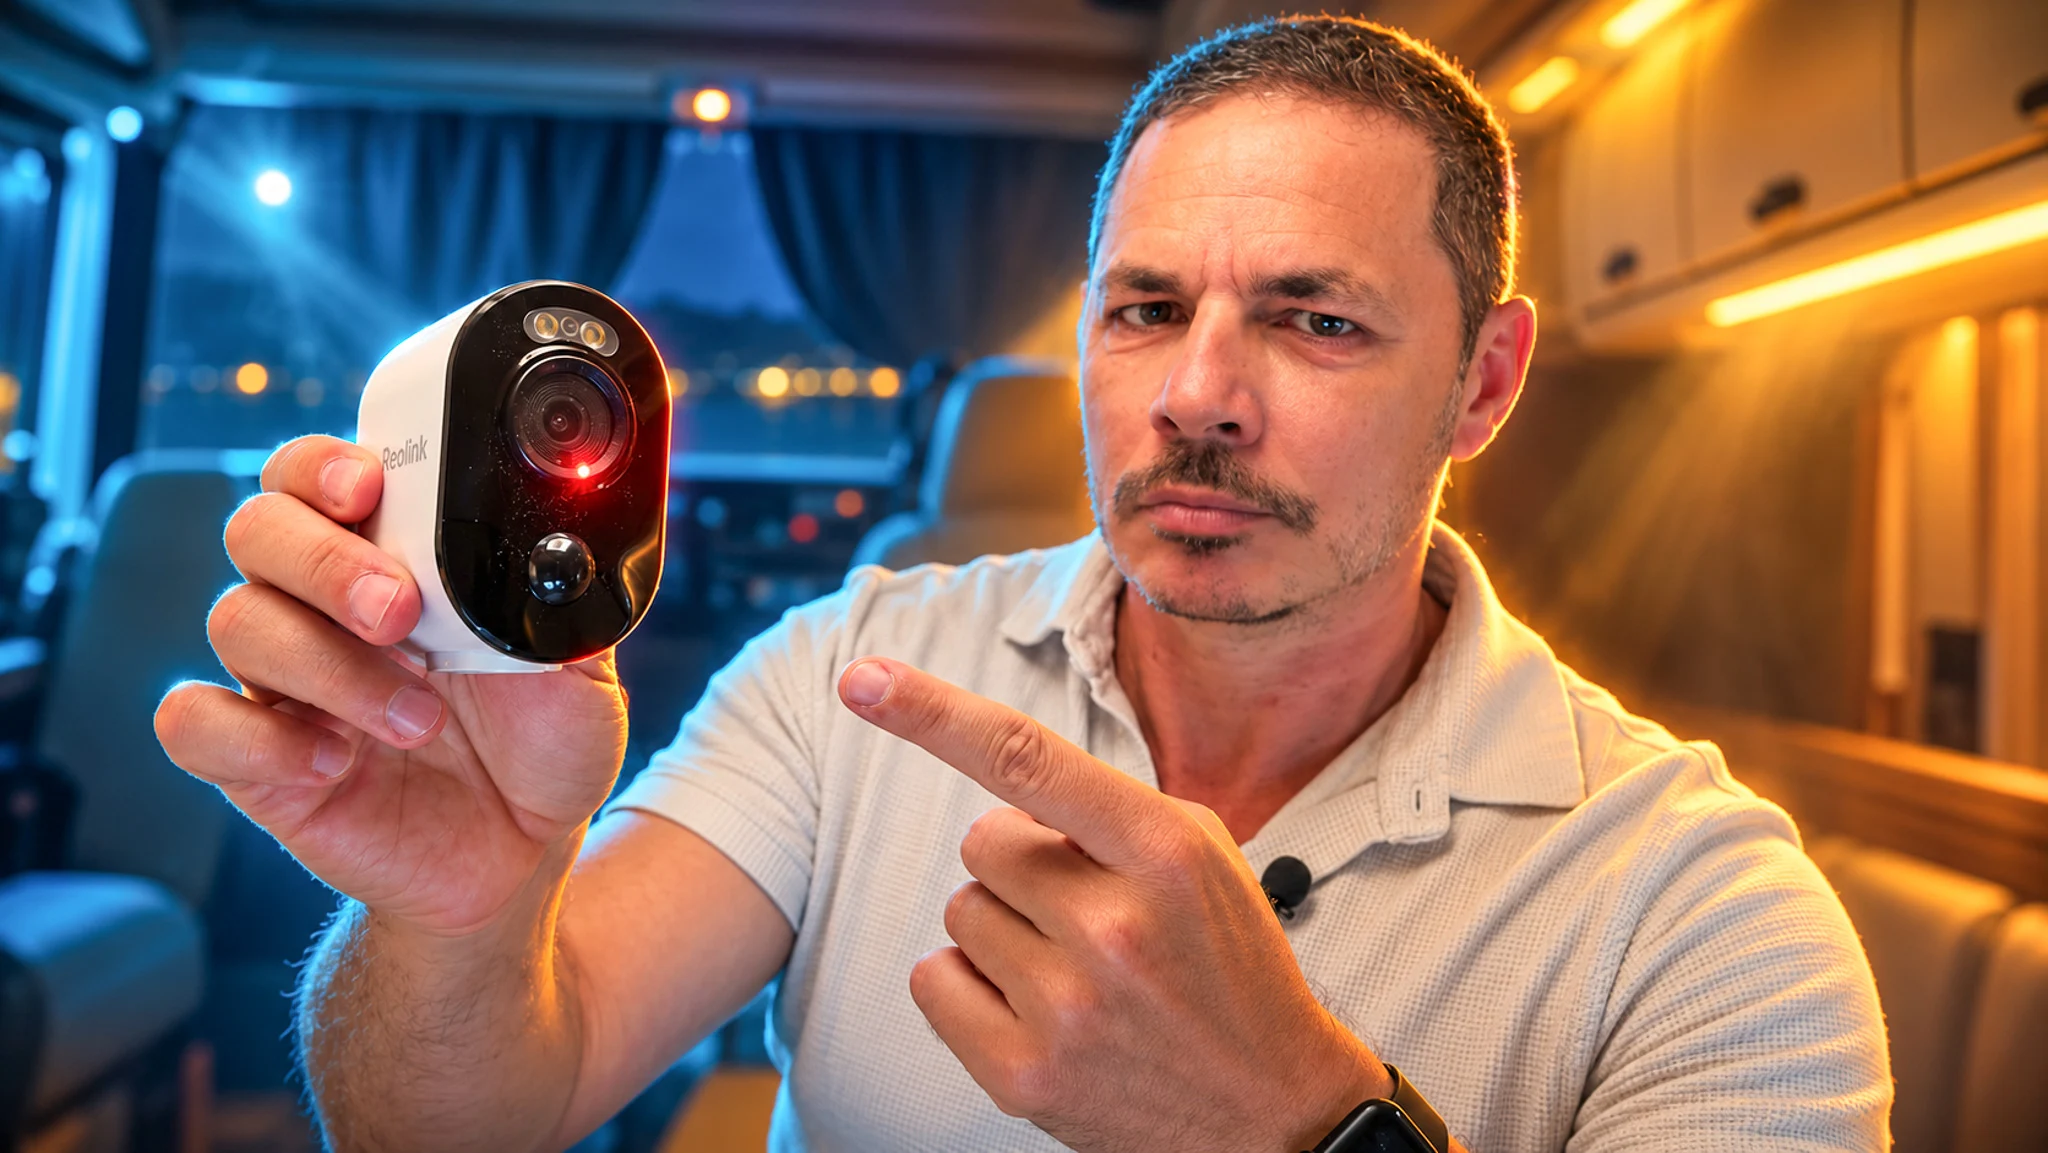
There are two cameras that we really used in our Hymer, the Argus 2E and then the Argus 3 Pro, and Reolink has removed both from the catalog. We continue to receive the question regularly, and for two years we have had nothing to answer. So when the 3 Ultra arrived in the box, the real question was not whether it was good, but whether it really took over.
I prefer to set the stage right away because I hate tests that pretend. Reolink sent it to us for this specific use, monitoring the inside of a camper van. It was therefore unpacked at home, mounted on the Home Hub, and most importantly, it then went into Édouard, because that’s where the real question is. You will have both here, the unboxing with its unpleasant surprise, and the passage in the vehicle with what it responded and what it still leaves open. No invented battery life measurement, no experience that I haven’t had.
Why this one, and not another
Our historical reference for monitoring the inside of the vehicle has been the Reolink Argus 2E, then the Reolink Argus 3 Pro. Two tiny, autonomous cameras that we set up when parked and removed at departure. The problem is that they have disappeared from the catalog, and we found ourselves recommending products that no one can buy anymore. It’s silly, but that’s exactly what triggers this article.
The 3 Ultra is their direct descendant. And here we need to be honest about what it brings, because the marketing sheet might lead you to believe otherwise. The infrared night vision, it already had it: the 2E had 4 LEDs at 850 nm over 10 meters, the 3 Pro had 6, and the 3 Ultra also has 6, still at 850 nm, still over 10 meters. The infrared is therefore not the gain, contrary to what we see elsewhere in the range where Reolink is abandoning it in favor of spotlights alone.
What really changes is the definition (from the 1080p of the 2E we go to 3840 by 2160, or 8 megapixels) and the Wi-Fi, which finally accepts 5 GHz in addition to 2.4. What you pay for is the weight: 335 grams compared to a 2E that you didn’t feel. There you go, it’s said, and it’s better than a table that sells you six new features of which five were already there.
What’s in the box
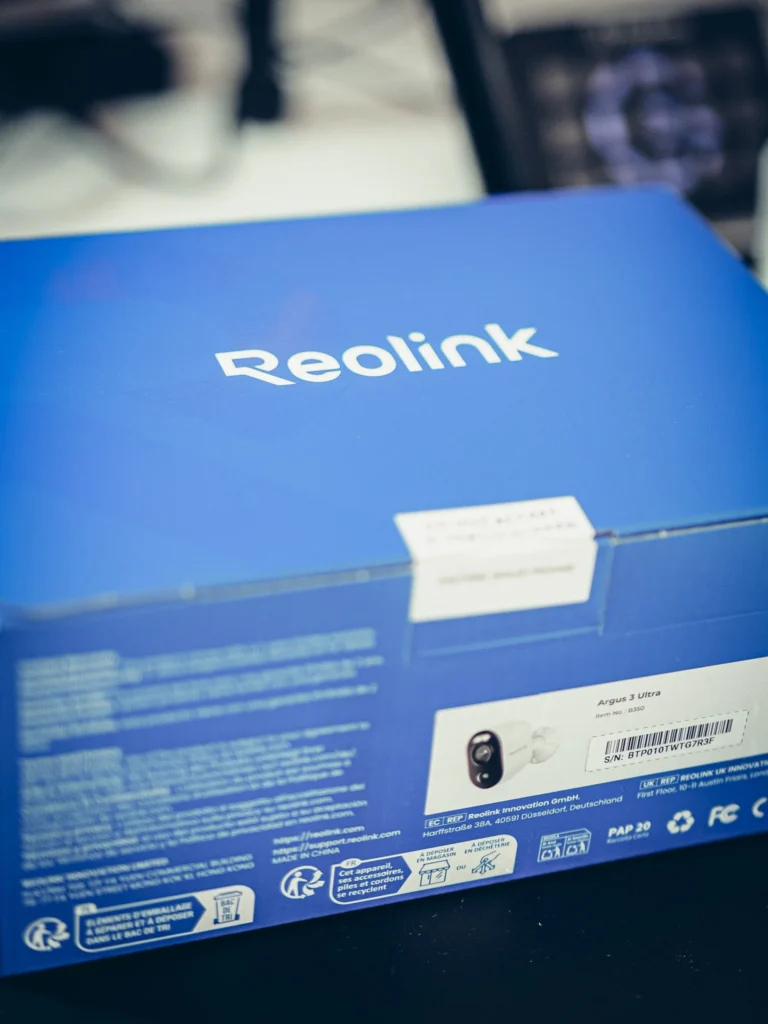
So Reolink boxes, when you’ve already had a few in your hands, you recognize them before reading the model name. All blue, the color of the logo. In terms of unboxing, we are not too disoriented, and I don’t say this as a reproach: it’s a range marker.
Upon opening, the paperwork first, in a small cardboard envelope, with the booklet, instructions, and stickers like “attention your vehicle is being monitored” (you can guess, it’s not the most interesting thing in the box). Then the camera, the solar panel that Reolink included in the shipment, and most importantly the different mounting systems, which deserve a pause.
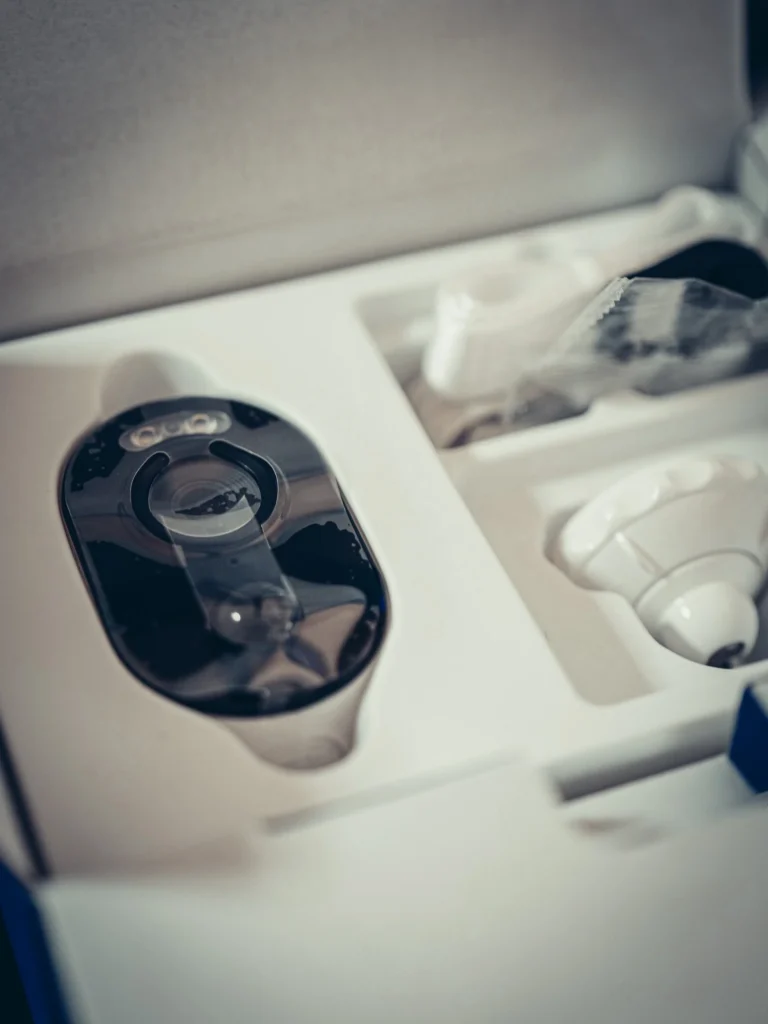
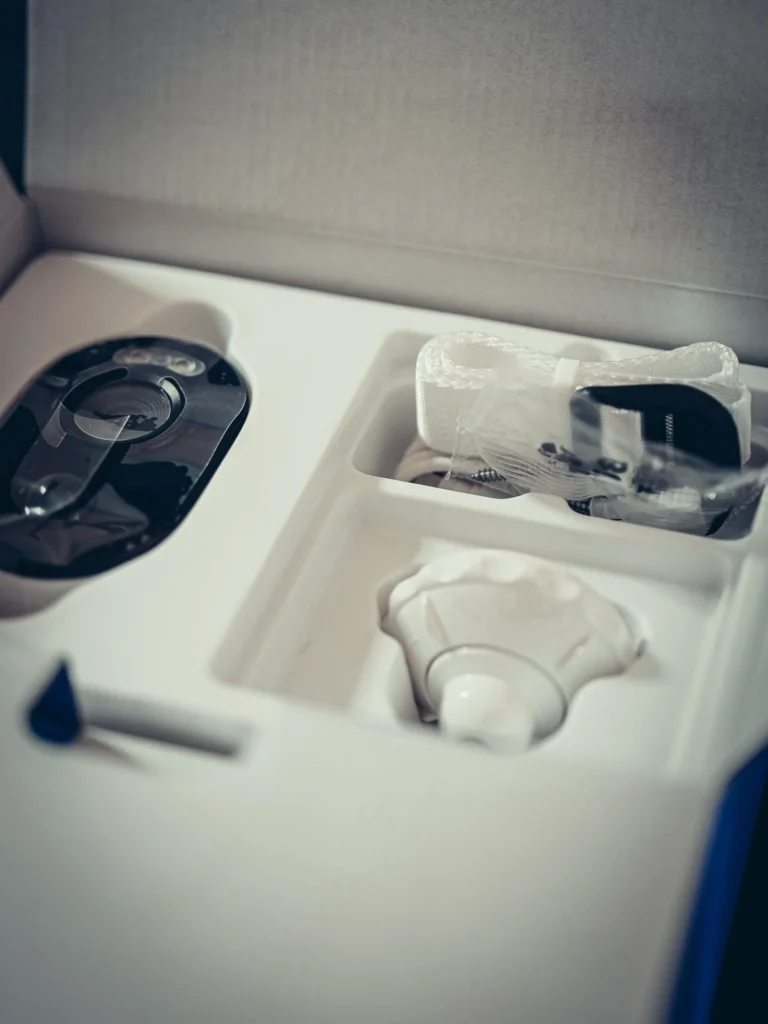
Because there are mounts with screws, and mounts without screws. And that is quite ingenious when you don’t want to make holes, neither in furniture, nor in a house wall, nor inside your camper van. Drilling in a fitted vehicle is not a detail: it’s the warranty, the waterproofing, the insulation, and the resale value that are at stake. A strap mount with no drilling is therefore a selling point, not a convenience.
First impressions: what the body tells you
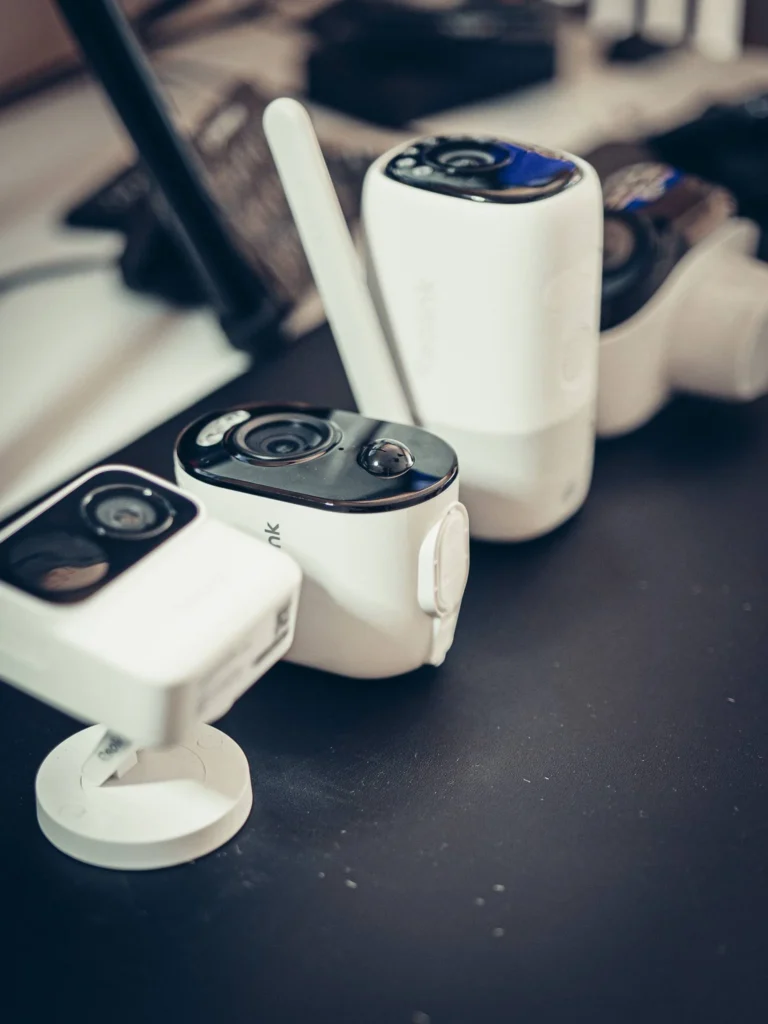
First reflex when taking it out: it has its small size. Bigger than an Argus 2E, but rather the size of a 3 Pro. And above all, significantly smaller than the Altas, which for a camper van interior is not a question of aesthetics but the condition to fit it somewhere without cluttering.
We placed them side by side, four cameras on the desk, and the size ranking is indisputable: the Argus MagiCam in front, the 3 Ultra just behind, then the Altas and the 4 Pro tied, a bit bigger. The first two are clearly intended for a vehicle, the other two can easily help out without having been designed for it.
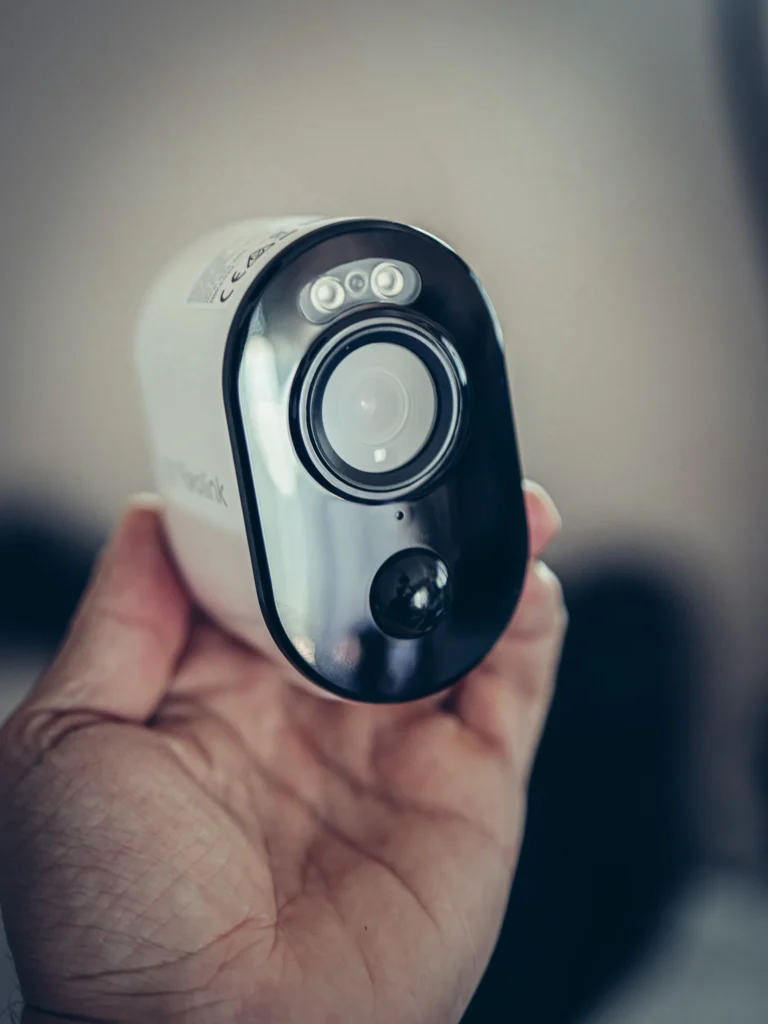
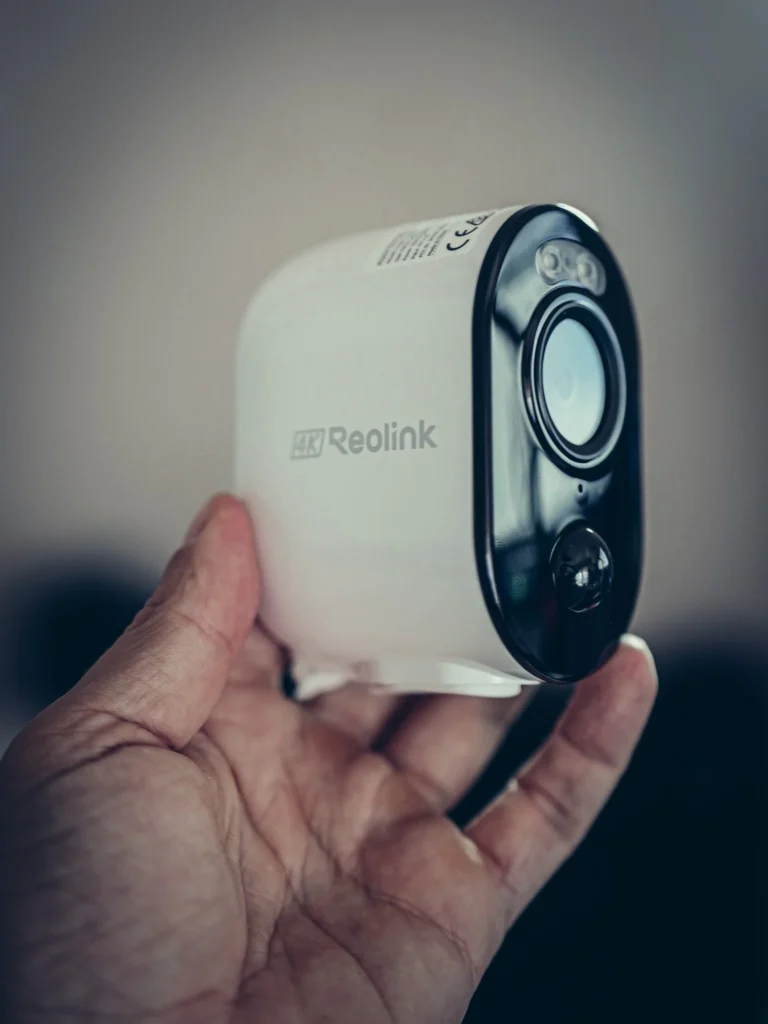
On the front face, a lens surrounded by infrared LEDs, the microphone, and a small hemisphere under the microphone that I didn’t know what to think of when I discovered it. It’s the PIR motion detection sensor, adjustable up to 10 meters at 100 degrees. So it’s not design, and it directly conditions where you place it.
The overall design remains that of the brand, sleek, white, with one nuance: the plastic is shiny and not matte. I honestly wonder if it doesn’t make it more noticeable in the sun than a satin finish, and behind a camper van window, the question arises even differently. I don’t have the answer, it’s the kind of thing that shows in use.
Storage, the only figure we can really calculate
It takes microSD cards up to 512 GB, and it records on event, not continuously. So let me be frank: Reolink does not publish any battery life duration for the 21.6 Wh battery, just a sentence explaining that it depends on settings, usage, and temperature. So I’m not going to invent a figure for you, we will measure it in the vehicle and publish it with its conditions.
Storage, on the other hand, can be calculated, and with the official figures: 4K in H.265, 15 frames per second, a variable bitrate from 1024 to 4096 kbps with 3072 by default. Here’s how to know how long your card lasts before looping.
Reolink does not publish any battery life duration, but storage is calculated using the official camera figures: 4K in H.265, 15 frames per second, default bitrate of 3072 kbps, and event-triggered recording. Choose your card and your trigger rate.
Installation, and the cable that blocked me
I have a Home Hub at home, so I wanted to install the camera on it. We launch the app, add a new device, scan the QR code on the camera, the app asks if we want to go through a Home Hub or directly, then a QR code appears on the phone and it’s the camera that scans it in turn. That’s how we link the two, and it worked the first time.
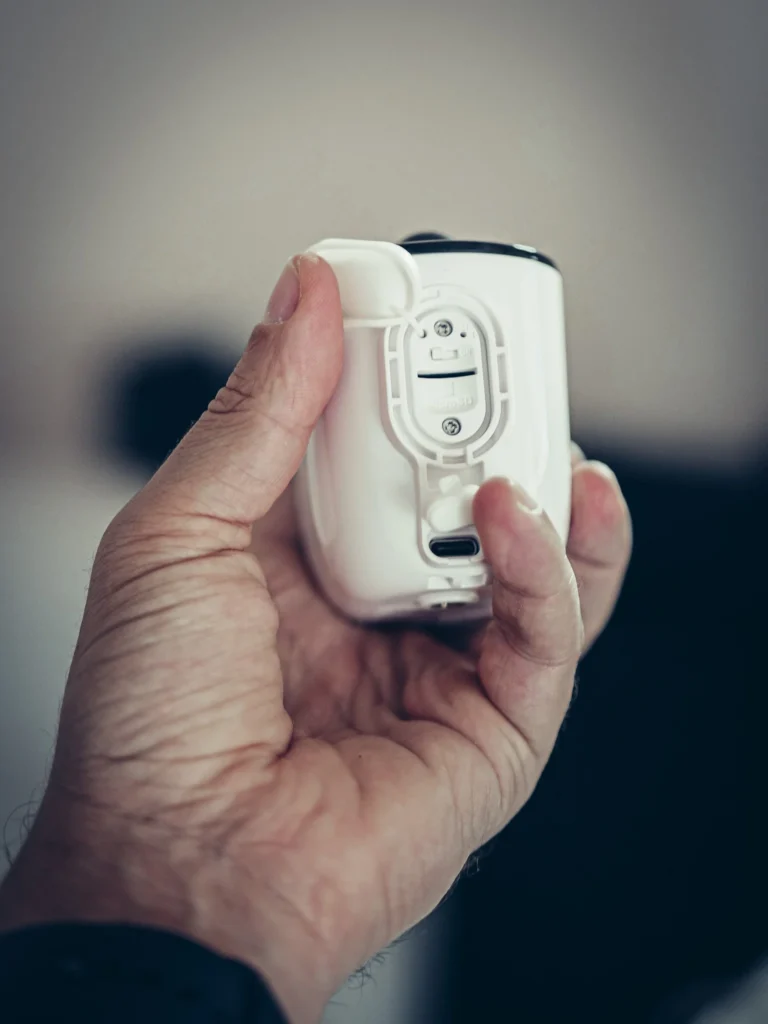
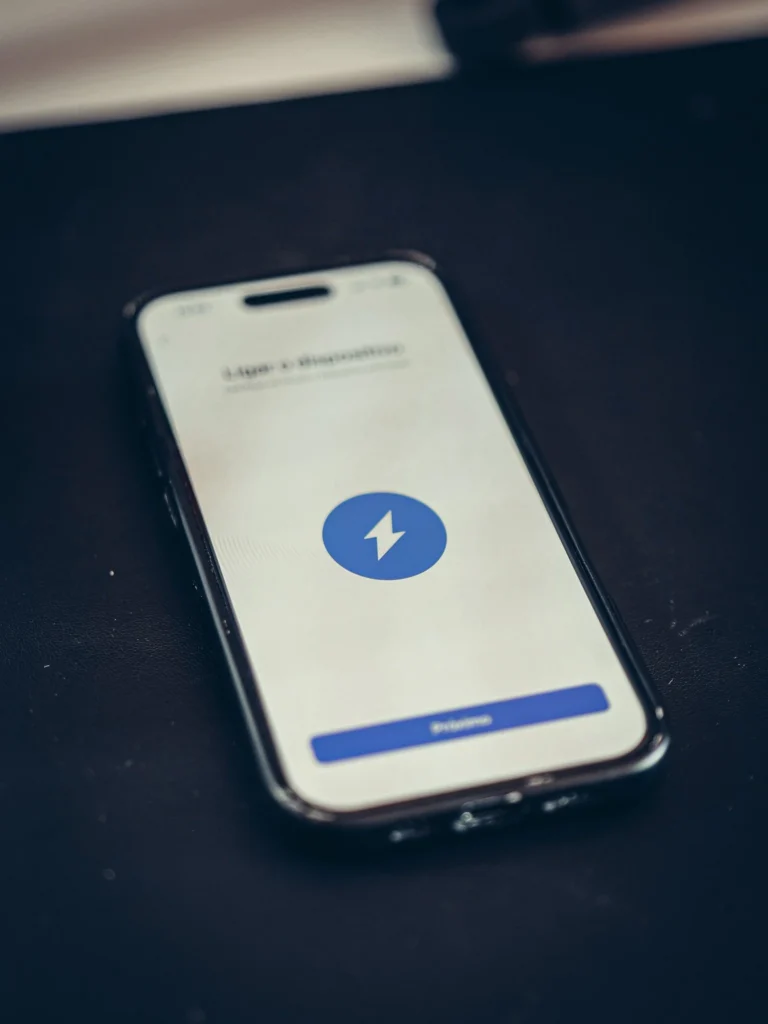
Except that to get there, I had to fix something I hadn’t seen coming. I plugged the camera with one of my USB-C to USB-C cables, the one that charges absolutely everything at my place, and nothing at all, the camera did not power up. Only the cable provided in the box, a USB-A on one side and a USB-C on the other, allowed me to start it. And I believe this is not the first time this has happened to me; Reolink cameras really like their own cables.
Two other frictions, while we’re at it. The sound of the camera during pairing is very very loud, you don’t expect it. And the step where the camera has to scan the QR code displayed on your phone requires a bright screen: turn the brightness all the way up before this step, otherwise you will spend some time.
My overall opinion on the installation, and I think it’s more accurate than simply saying it worked the first time: while not extremely complicated to install, Reolink devices still require a minimum of knowledge. With a Home Hub already in place, it’s simple, because you hassle once with the Hub and then everything you plug into it is easy. Directly on the phone via the router, it’s frankly less obvious. And in a camper van, without an onboard Hub, it’s precisely that path you will take.
What the app allows you to adjust
There are quite a few settings, and that’s where Reolink excels. Detection, intrusion notifications, display quality, audio, watermark, light, siren type, and even a timelapse if you want to immortalize your sunsets from the vehicle (yes, a surveillance camera filming the sunset, we agree it’s a detour, but admit it’s tempting).
Two settings really matter for security use. The first is the alerts that distinguish the type of subject, people, vehicles, animals, thanks to the embedded AI. In a parked vehicle, filtering for people is what prevents you from getting forty useless alerts per night, thus preventing you from eventually turning off notifications. The second is that some Reolink notifications go through Do Not Disturb mode. When you sleep in your camper van, it’s the difference between being alerted and not being alerted.
The rest of the ecosystem is what I prefer about this brand. The phone app is quite well made, but it’s especially the macOS computer application that changes everything: it connects to the Home Hub, it groups all devices, and you feel like you have a digital recorder at home without paying the price. For that, the Hub and the software are really great. A small honest reservation though, because it’s worth mentioning: all this assumes a fixed base at home. While wandering, you fall back on the phone app and the microSD card.

I'm Xavier
I test gear over months, in the van and day to day, and I say what doesn't work. If that saves you one bad purchase, leave me your address.
Ce que vous souhaitez recevoir :
How does it perform in the motorhome?
Well, here’s the part that really interested me. The camera went into Édouard, with the real constraints: a wall that is not a wall, vibrations, no internet box, and shutters that we close. I filmed everything, and you can see it in the video at the top of the article.
The Argus 2E mount screws onto it, without making a single hole
So that’s the nice surprise, and it’s exactly what I expected from the replacement I mentioned earlier. I already had an Argus 2E mount fixed in the camper van, the one that served the 2E and then the 3 Pro. I screwed the 3 Ultra onto it and it worked very well. The mount is the same from one camera to another, so there’s no need to drill anything.
And that, in a fitted vehicle, is not a small advantage. If you had a 2E or a 3 Pro and were wondering what to replace it with, you buy the camera and place it on what is already there. It’s also about the same size screw, or exactly the same, as what you find on camera tripods (the one that’s filming me, by the way). So all the little photo equipment that already hangs around in the van does the job. And for those who don’t want to screw anything at all, there’s the strap that goes around a beam, which I did in a cellar and here in the camper van.
When parked: yes. While driving: no.
However, there is a rule, and I prefer to be clear because this is the real weak point of this camera for vehicle use. It is a bit heavier than the 3 Pro and the MagiCam. So I do not recommend leaving it on its wall mount while driving. When parked, no problem, it won’t move. But on the road, with the weight and vibrations, you will damage your partition over the kilometers.
Vibrations in a camper van are a bit of the genre’s disease, they make everything vibrate and everything that is screwed ends up needing a revisit. So the gesture is: you mount it when parked, you take it down before driving. With the screw, it takes ten seconds, it’s not going to ruin your day. And for placement, put it in a corner of the cabin, not in the middle of a side wall: its ratio allows it to see almost the entire vehicle from a corner, and much less from a wall.
The image is the most beautiful I’ve had from Reolink, with a slight globe effect
It is 1:16 PM when I do the test, in broad daylight, and honestly, the image is nice. It’s 4K, you can see it, and I don’t remember having such a beautiful image on the various Reolink cameras I’ve had in my hands.
But there is a caveat, and it’s not written anywhere on the technical sheet: there is a globe effect, a slightly rounded image on the sides. Barrel distortion, basically. On a surveillance camera, it doesn’t prevent you from doing your job, we’re not filming a movie, but I prefer to tell you rather than letting you believe in a perfectly flat image.
A word also on the refresh rate, because the mention of 4K makes people dream for the wrong reasons: this is not a recording camera, you are not going to film yourself with it. The refresh rate is deliberately low, which allows it to last a long time on battery.
At night, with closed shutters, the infrared does the job
The test that interested me the most: I completely closed the shutters, in the middle of the afternoon, to recreate the conditions of a sealed cabin. There was just a trickle of light through the shutters, and that was enough for it to switch to night mode. You can see the details, you can see my face very well, and even when stepping back, it holds up.
And that’s where the infrared makes all its sense, because it’s the number one reason I recommend this camera over another. A camera with spotlights, at night, illuminates the inside of your camper van while you are not there. However, when it’s dark outside and bright inside, you can directly see what’s happening inside. And what you would see is that there is no one there. Agree that for a security camera, it’s pretty much the opposite of the intended purpose.
Without a modem on board, it is of no use at all
I put this in bold in my mind since the beginning of the test. You absolutely need a 4G router modem, or a Starlink, in the camper van. Not the connection sharing from your phone.
Why? Because if the camera is connected to your phone’s built-in modem, the connection dies the second you move away from the vehicle. And that’s precisely when you need it. Your camera is no longer on the internet, so if there is an intrusion, you simply won’t know. With a microSD card inside, you will recover the images upon return, which is already something for insurance, but you won’t have been able to do anything at the moment.
So if you don’t yet have a permanent network in your vehicle, start there. A camera without a connection is a recorder that you consult too late. At home, the question doesn’t arise the same way; it’s the Home Hub that creates the camera network itself.
And yes, it charges on the onboard USB ports
This was my big concern after the cable hassle at home, and I can finally answer it: charging on the camper van’s USB ports works. With its original cable, of course, we can’t change that. We often have 12V with USB ports in a camper van to power small devices without going through a converter, and the camera accommodates that very well.
This changes everything for mobile use because if the answer had been no, you would have had to go home to charge your surveillance camera, which would have been quite ridiculous. Here, no. It lives in the vehicle and charges in the vehicle.
Does it deserve a place in your motorhome?
Yes, and not for a technical reason. The right framework to judge this camera is not to compare it to other cameras, but to compare it to what it is supposed to protect. There is a good chance that the value of what you leave in your camper van when you go to a restaurant far exceeds the price of the device. From there, I don’t see why it wouldn’t be essential.
There is also the second use, and it broadens the audience quite a bit: monitoring your pet left inside. We already talked about it for the MagiCam, it’s exactly the same interest here.
And if you’re torn between the two, here’s how I’d frame the choice rather than make it for you. The MagiCam is even cheaper and designed for vehicle use, but it really is a backup camera, and to my eye the 3 Ultra looks a little more professional in terms of image quality. The 3 Ultra has the advantage of being versatile enough for both home and vehicle use, which matters more than you might think: when you head off in your motorhome, you generally want to keep an eye on your home too. If you want a dedicated vehicle camera on a tight budget, go for the MagiCam. If you need one camera to do both jobs depending on the season, go for the 3 Ultra.
There’s still one gap, and I don’t want to bury it at the bottom of the page: how many days the battery actually lasts when monitoring a parked vehicle. Reolink doesn’t publish a figure, I’m not going to make one up, and a proper measurement means leaving the camera running for several days while recording the number of activations and the temperature. That’s the only thing still missing from this review, and I’ll add it here along with the test conditions, because a battery life figure without those conditions is worthless.

What we are asked about the Argus 3 Ultra
Does the Argus 3 Ultra really replace the Argus 3 Pro?
On paper yes, it's its direct descendant and it retains the same format. It moves to 4K where the 3 Pro produced 5 MP, it adds 5 GHz Wi-Fi, and it keeps exactly the same infrared night vision: 6 LEDs at 850 nm, 10 meters of range, the same figures as its predecessor. It gains 5 grams in the process, 335 against 330. So yes, it is indeed the successor, but the successor in definition and network, not in night vision.
Why isn't my USB-C cable charging the camera?
It's the unpleasant surprise of our setup. The port under the camera is indeed a USB-C, but our commercial USB-C to USB-C cable didn't power it at all. Only the cable provided in the box, which is USB-A on one side and USB-C on the other, was able to start the camera. We still don't know if it's the Reolink cable that is special or ours that wasn't good, we only tested one cable. In the meantime, keep the original one, especially if you're going away with it.
Do you need a Home Hub to use it?
No, but it changes a lot of things. The app offers native integration with Home Hub, and for us, the pairing worked on the first try. With the Hub, recordings go there and the microSD card becomes optional. Without the Hub, the camera connects directly via the router, and that's the less obvious route of the two. In a motorhome, without an onboard Hub, that's exactly the route you will take.
Is the 4K from this camera real 4K?
The definition yes, 3840 by 2160, or 8 megapixels and the exact 16/9. The fluidity no: it's 15 frames per second. To identify someone on a surveillance recording, 15 frames per second are more than enough. To film a moving scene like a video camera would, it's not made for that. It's good to know this before buying, thinking you are getting a smooth 4K camera.
Does the provided solar panel serve any purpose in a camper van?
Frankly, no. A motorhome already produces its own electricity, and it very often has its own panel on the roof. Sticking a small additional panel on the body to power a camera is absurd. The solar aspect of this bundle is a residential argument, for a camera placed outside around the house. In the vehicle, the power comes from the onboard USB ports and the internal battery between two charges.
105 degrees of field, is that enough to cover a cabin?
Yes, provided that it is placed in a corner. From the corner of a rectangular volume, it takes 90 degrees to see from one wall to the other, and the camera offers 105 degrees horizontally, plus 125 degrees diagonally. Mounted along a wall, however, it will cut off half of the vehicle. This is not a flaw of the camera, it is a placement rule.
Would a wider angle be better?
Not necessarily, and we learned this with the 4 Pro. It sees at 180 degrees, but it outputs 5120 by 1440, which is exactly 32/9: a very stretched image in width and very low in height, which becomes frankly difficult to read on a phone. The Argus 3 Ultra remains at 16/9, so it's readable on the screen where you really check your alerts. The right criterion is not the angle, it's what you can distinguish on your phone.
Equipping your van, security included
Batteries, solar, conversion, security. What we found after months of real use, and what we would not buy again. An email when we have actually tested something, not before.
Ce que vous souhaitez recevoir :